
Yogurt is one of those staple foods in my house. So buying overpriced, highly-processed yogurt is kinda something I’m not willing to mess around with. I’d rather make my own, and luckily it’s super easy. Everyone in my family prefers homemade plain yogurt over store-bought yogurt and yogurt has become one of those things that we look forward to each morning and afternoon. What I love about yogurt is that you can serve on the side of just about everything, use it in baked goods, and mix it with fruit and freeze to make yogurt pops. Despite its versatility, I used to be afraid of making my own yogurt. It always seemed so hard and not worth the effort, but I can assure you that making your own yogurt is a lot easier than you might think.
 If you think that homemade plain yogurt is not something worth making or you think the process might be too difficult, allow me to walk you through the steps and show you just how easy it can be.
Step 1: Heat the milk.
You’re going to want to heat the milk slowly until it reaches about 200 degrees F. Milk and other dairy products can burn very easily so it’s best to stand over the milk, stirring and scraping the bottom. If the milk burns, it’ll result in burnt-tasting yogurt or essentially wasted milk, and we don’t want that.
Step 2: Place the pot of milk in an ice bath.
As soon as your milk is heated, make an ice bath in your sink to place the pot in. Let the pan sit in the ice bath until it’s lukewarm. Don’t worry, it cools down pretty fast.
Step 3: Pour the warm milk into a quart jar.
Once you pour it into a jar, you’ll need to add the yogurt starter or plain Greek yogurt. Whisk it together thoroughly.
Step 4: Place the quart jar into the oven.
Turn the oven light on and let the yogurt bacteria’s do their magic. Let the yogurt sit for eight to ten hours. I like to take mine out at the eight hour mark because after ten hours of culturing, the yogurt just keeps getting tangier and my family doesn’t like very tangy yogurt.
Step 5: Place the yogurt in the fridge for at least 45 minutes before eating.
The yogurt needs to refrigerate in order to stop the incubation process and chill the yogurt. If you don’t want to use the yogurt right away, just let it sit in the fridge until you’re ready to use it.
Step 6: Spoon off the whey.
Once you take your yogurt out of the fridge, you may notice a yellowish, clear liquid sitting on your yogurt and that, my friends, is called whey. Don’t stir it in. This stuff will make your yogurt as runny as melted cream cheese. And we do not want that. I just get a spoon and a cup and spoon it off. You can move a little bit of the yogurt to make the whey puddle, which makes it even easier to scoop off.
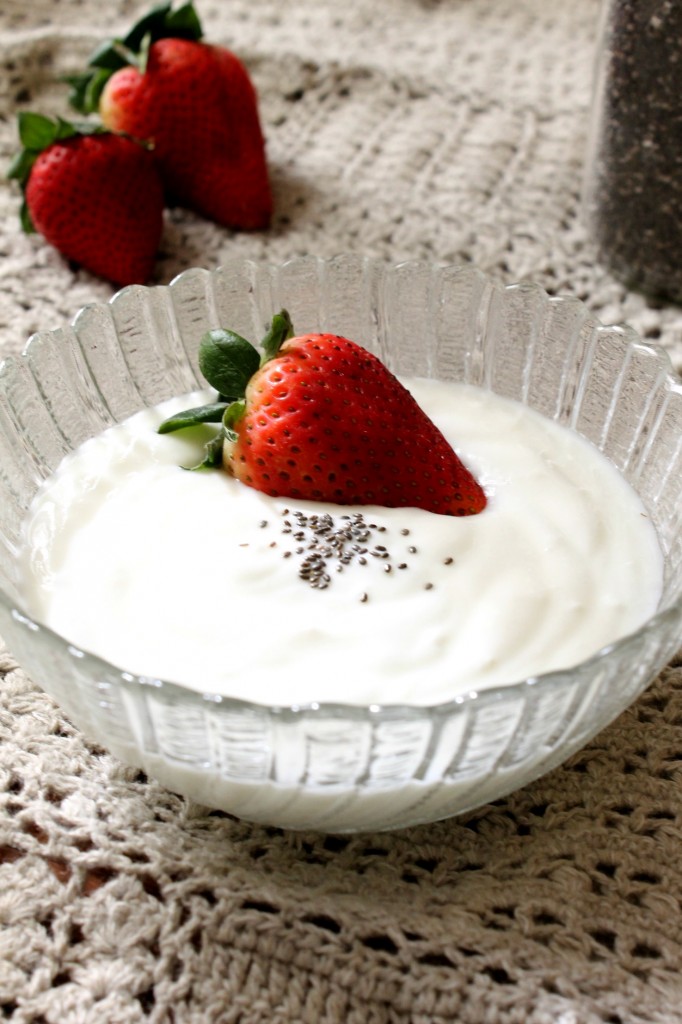
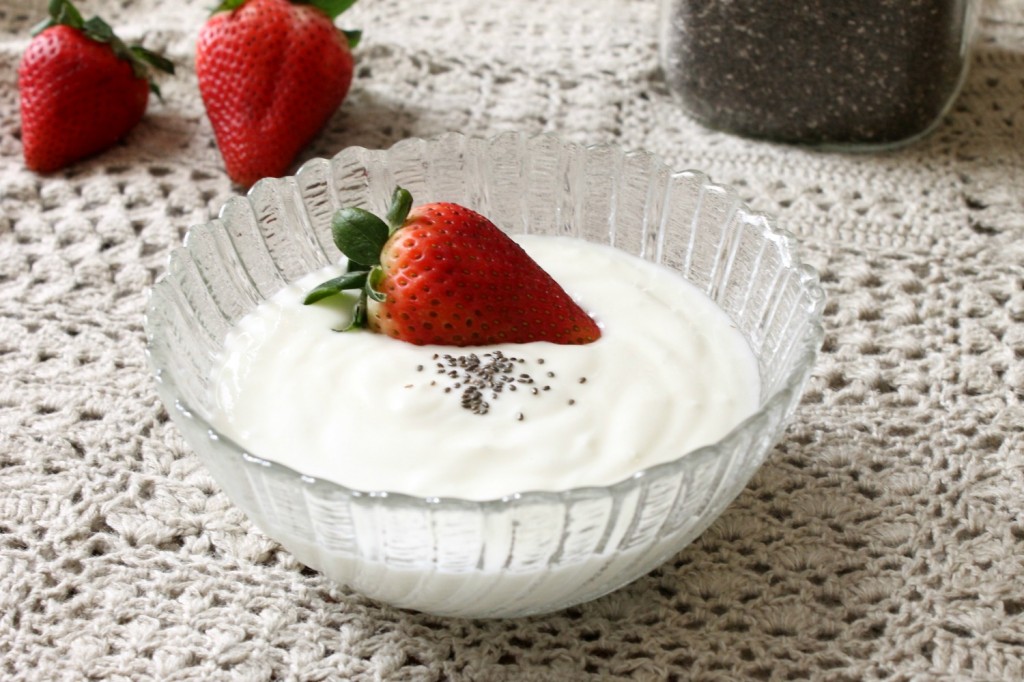
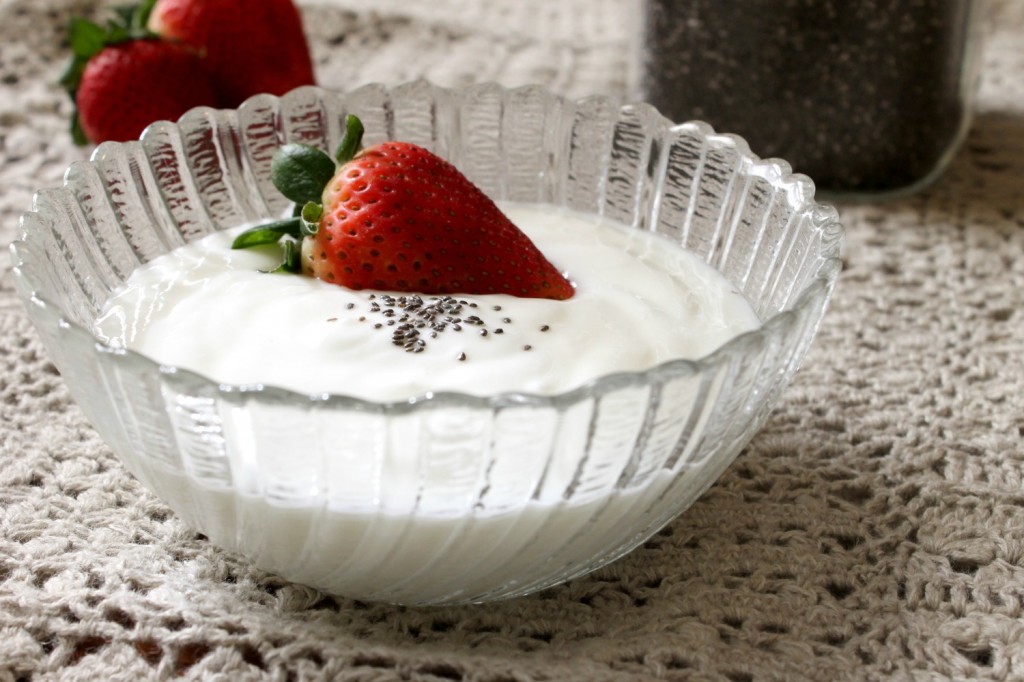
Step 7: Flavor as desired.
Add whatever you please. I love some fresh berries on mine, or maybe some vanilla and honey. I recommend sweetening individual servings instead of the whole container for convenience.

Of course, I like chia seeds too!
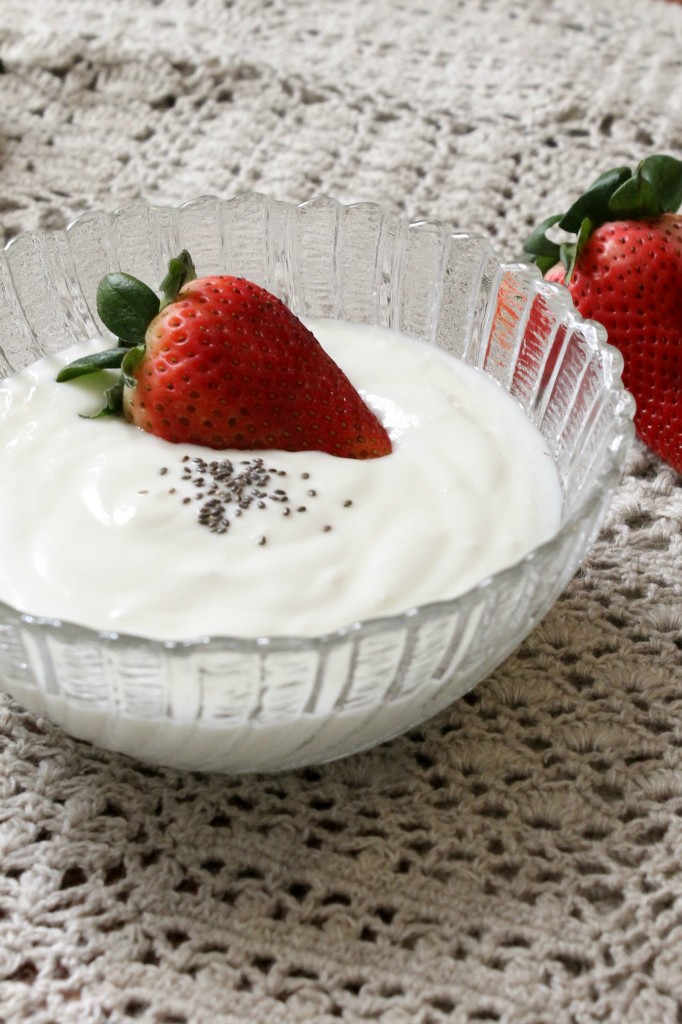
This yogurt is so delicious. It’s creamy, dreamy, and tastes just as good, if not better, than the kind you can get at the store.
Also, the reason why I flavor yogurt right before I serve it is because the alcohol in vanilla extract can kill the bacteria and cultures in the yogurt, giving you runny yogurt and—well we’ve already had this talk. I’ve ruined so many batches of yogurt in the past, but adding vanilla extract to the whole batch has always given me runny yogurt. If you want to make a whole batch vanilla flavored, try vanilla bean paste!
Homemade plain yogurt can save you some big bucks—especially if you buy two quarts of it a week. If I remember correctly, you can get a quart of yogurt from the store for three or four dollars. When you make a quart of homemade yogurt, depending on how much your milk costs, can range from $0.87 to $1.25! Is that amazing, or what?
Here’s the recipe:
- 1 quart (4 cups) organic whole milk
- 1 yogurt starter packet (or ¼ cup yogurt)
- Heat the milk to 200 degrees.
- Remove pot from the heat and place it in an ice bath. Let the milk cool until lukewarm (115 degrees).
- Stir in the yogurt starter or yogurt, mixing well. Pour mixture into a quart jar.
- Set the jar in a warm spot for 8 to 10 hours, or overnight, to culture and set (time depends on desired firmness). Set in your oven with just the oven light on.
- After the yogurt is set, place yogurt in refrigerator for at least 45 minutes before eating. Flavor and top as desired.


Homemade yogurt is the best! We like to add a dash of vanilla and a dash of maple syrup to ours, the kids chow it down. Thanks for linking up at Simple Meals Friday!
I have never seen this done before, and love that you have provided an easy to follow how-to! I am always looking on how to get away from processed food, and even though we love the boughten stuff, it is often packed with sugar.
It’s great to hear that you’re trying to eat healthier Julie! I’m rooting for ya! Making yogurt at home is a great step towards better health.
Your instructions are great!
Thank you for stopping by the Thoughtful Spot Weekly Blog Hop this week. We hope to see you drop by our neck of the woods next week!
Just a quick question about the yogurt starter packet… any suggestions on names and where to find? I found your blog and this recipe at a great time. I have recently been trying small steps to be healthier for the sake of me and my young family. I was literally standing staring at the yogurts for ten minutes at the grocery store trying to figure out what I should buy! Anyway, I feel that God led me to find your blog… sounds silly, but thanks!
Hi there! Thanks so much for the kind words—that really made my day! I usually use either Chobani or Stonyfield Greek Yogurt (full-fat if you can find it) as a yogurt starter because it already has active cultures in it. I hope you enjoy the yogurt!
My oven has LED lights, so no heat is given off. I have heard some people suggest heating the oven to 180 degrees then turning it off, before placing the yogurt in the oven. Do you think this would work or do you have a better suggestion? I also have a dough proof setting that keeps the oven at a constant 100 degrees, but don’t really like the idea of running my oven for 8 hours every time I make yogurt. plus it would add to the cost. I am super excited at the thought of saving money on yogurt.