
The one thing I hear from most people who have never made bread before is that it’s not worth the effort.
Let me ask ya something. Have you ever experienced a bite of fresh homemade bread? Have you ever experienced the wonderful scent that comes from deep within the kitchen while the bread is baking?
No? Well, my friends, if you’ve never made bread at home before, you don’t know what you’re missing out on. And when the effort is hardly anything, I’d say the worth of making bread at home far surpasses the effort when it comes right down to it.

Now, you’ve probably figured it out by now, but I’m a sucker for homemade bread.
Especially when it’s so easy to make. Guys, I make all sorts of homemade breads on a weekly basis. I wouldn’t exactly keep making these bread recipe if they weren’t easy, inexpensive, and a huge hit at my house.
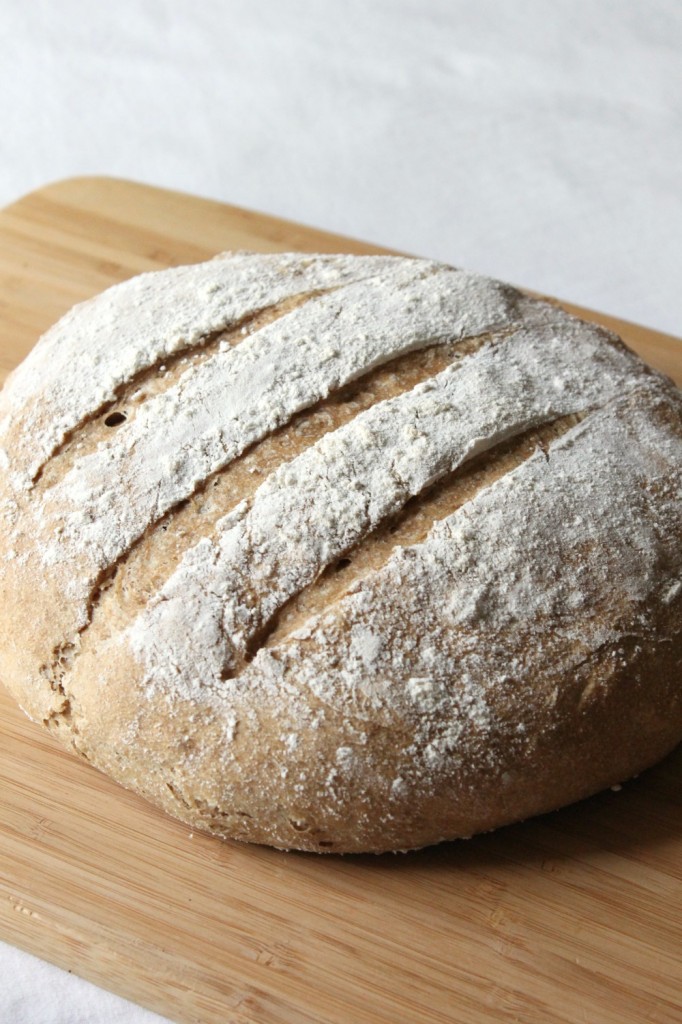
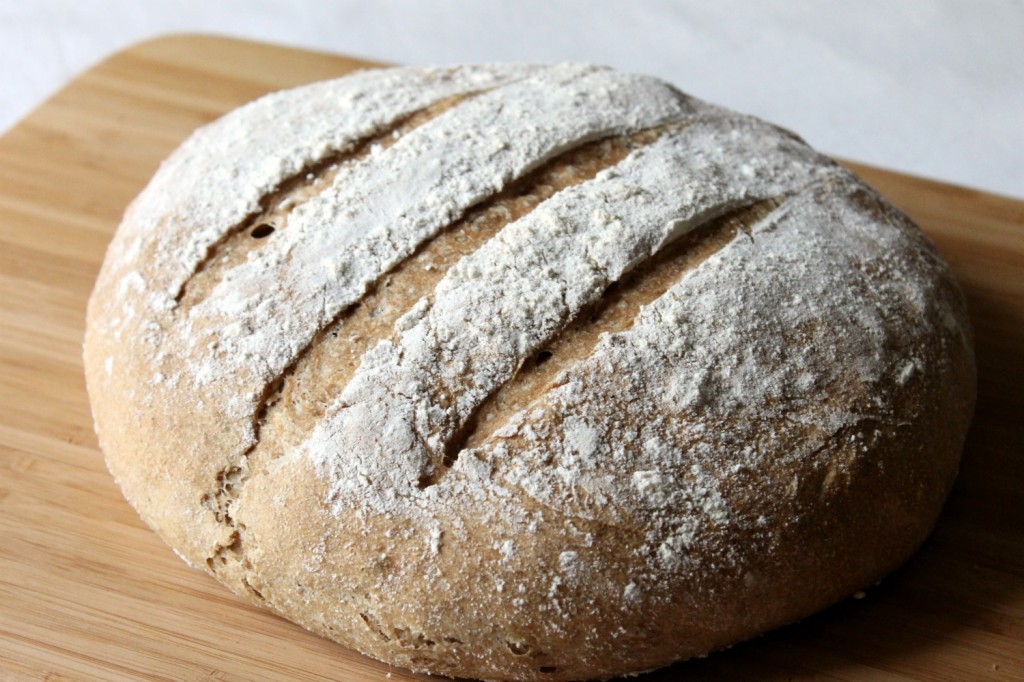
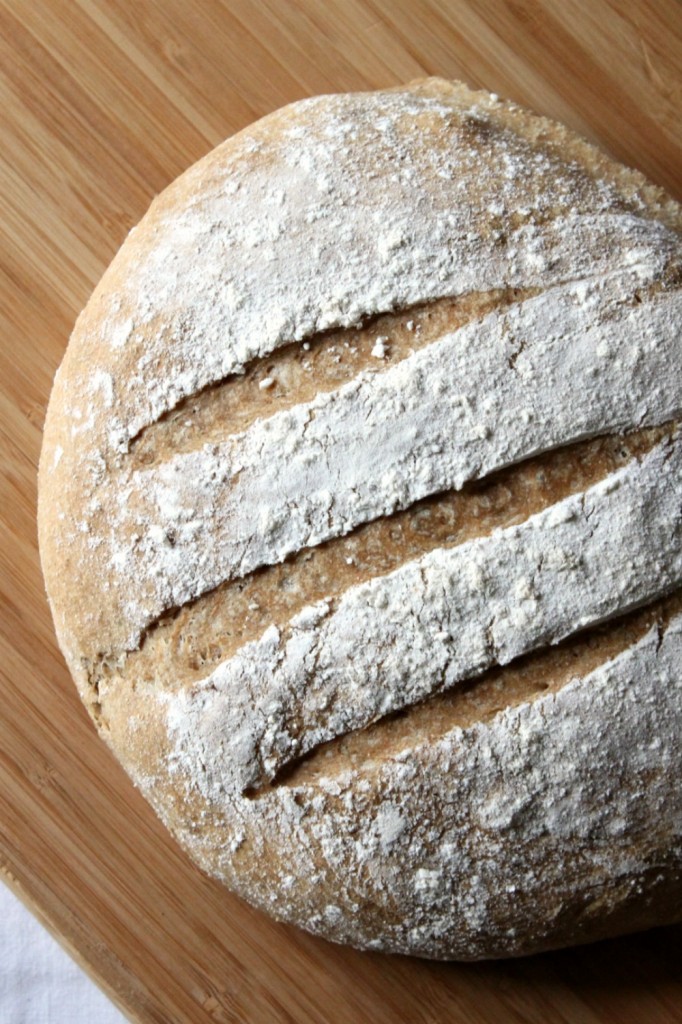
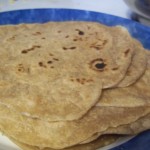
Now…about this bread. It’s got a chewy, crusty exterior, a custardy, bready interior, and it’s highly addictive. Consider yourself warned.
Let’s go over the process of making the bread. You start by combining all of the ingredients in a medium-sized bowl (in the order listed in the recipe). Mix it all together until it forms a cohesive ball and everything is thoroughly mixed together.
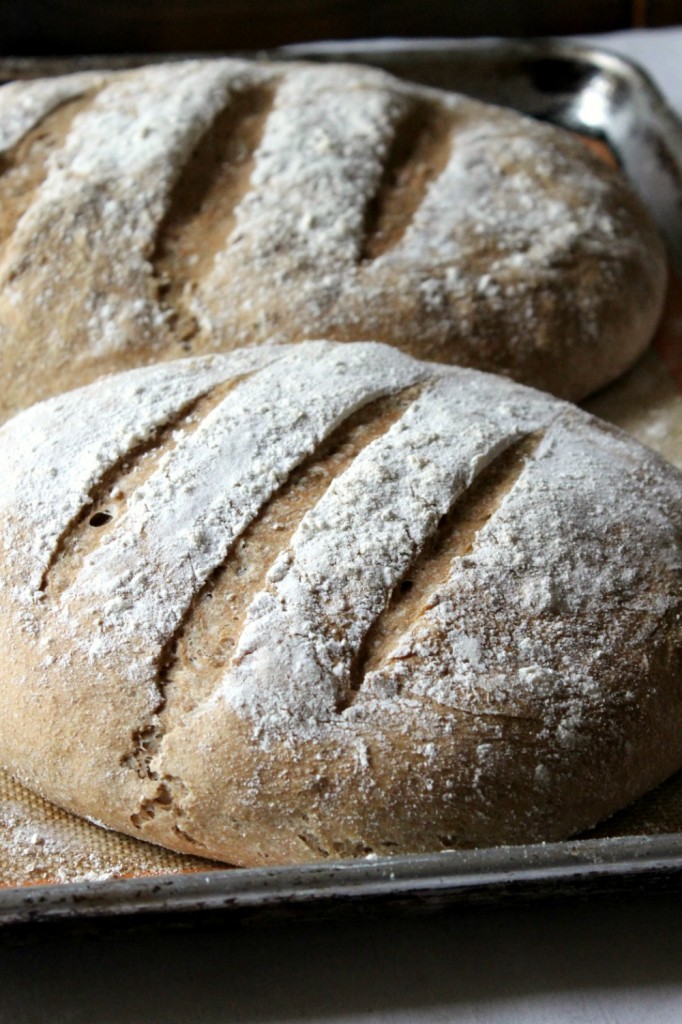
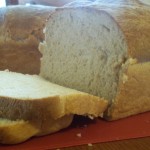
Let it rise for 2-5 hours. The longer you let it rise, the more sour the bread will taste. After the dough has doubled in size, divide the dough into 2 or 4 balls, depending on the quantity and size of loaves you want. I usually make two large loaves and use it for sandwich bread during the week.
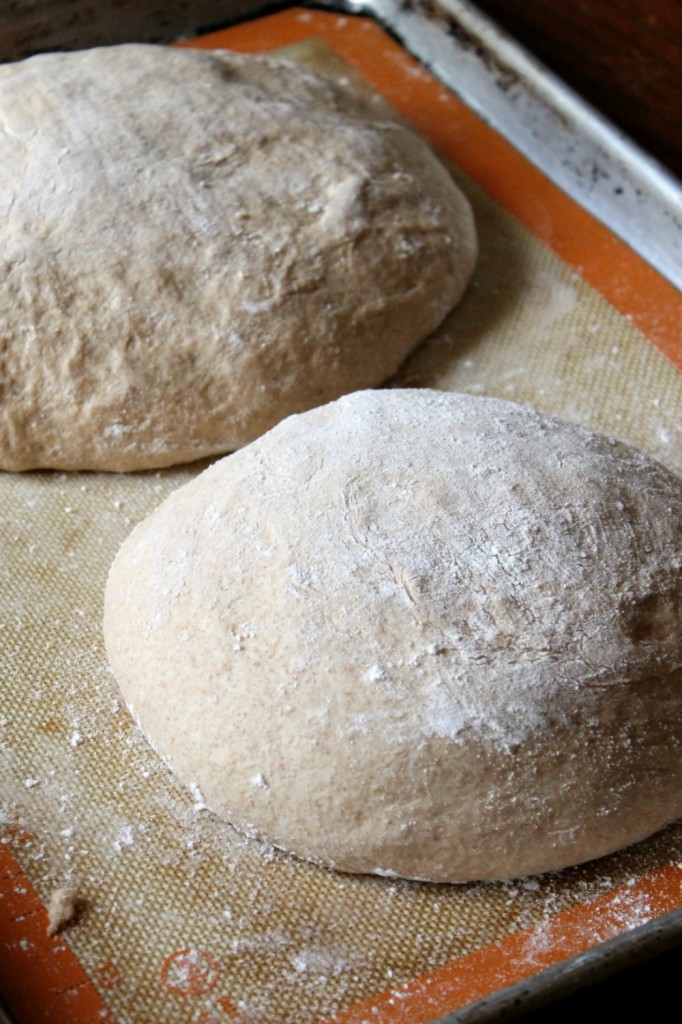
Put the dough balls on a prepared baking pan. Shape the balls of dough into whatever you like—a round loaf or boule as they say in French, baguette, you name it! Let the bread dough rest for 40 minutes.
After 30 minutes have passed start preheating the oven and place a broiler pan in the oven with water in it. This makes the oven steamy, yielding a crispier and chewier crust.
And after that all you have to do is slash, sprinkle with flour, bake, and let cool. It may sound difficult, but it couldn’t be easier.
This whole wheat crusty bread will knock your socks off. It’s unbelievably easy to make, takes 4 ingredients, 1 bowl, 1 spoon, 1 pan, and a will to make some of the best bread known to man.
Here’s the recipe:
- 1½ tablespoons active dry yeast (or 2 packets)
- 1 tablespoon salt
- 3 cups lukewarm water (110 degrees)
- 2 cups unbleached all-purpose flour
- 4 to 4½ cups white whole wheat flour
- Combine the water, yeast, and salt in a large bowl and stir. Add the flour, and mix until it's thoroughly combined. Dough will be quite loose. Cover the bowl with a kitchen towel and let the dough rise at room temperature 2 hours.
- Divide the dough into two or four balls. Shape the loaves however you'd like and place each shaped loaf on a parchment paper or a silpat lined baking sheet (a pizza stone also works well for this). Let the dough rest for 40 minutes.
- Preheat the oven to 450 degrees F.
- Place a broiler pan on the bottom rack of the oven. Slash the top of each loaf with a serrated knife three times. Pour one cup of hot water into the broiler pan and shut the oven quickly. Bake the bread for 20 minutes, or until the top is well browned. Let the bread cool completely before slicing.
Pin it:

Try my delicious homemade bagels next.

This looks like the perfect crusty wheat bread! Thank you so much for linking up at Tasty Tuesday! Your recipe has been pinned to the Tasty Tuesday Pinterest board! Please join us again this week!
Gorgeous loaves of bread! Thanks for linking up with What’s Cookin’ Wednesday!
The bread looks amazing and I’m surprised the recipe is quite easy! Yes, I love freshly made bread but I usually use bread machine. But I know that it cannot get the great texture as those handmade ones. Thanks for sharing the great recipe
Margaret, I’ve never made bread myself…mostly because I really suck at baking. Ha! But this looks really…really delicious. I’m gonna try this next weekend Margaret. Just one question: What’s the difference between the unbleached all purpose flour and the white whole wheat flour? Can they not be used interchangeably?
Okay, so unbleached all-purpose flour isn’t the same thing as white whole wheat flour. White whole wheat flour is just like regular whole wheat flour except that it’s ground from white wheat berries instead of red wheat berries. Unbleached all-purpose flour is basically the same thing as regular ‘ol all-purpose flour EXCEPT that it’s not bleached.
White whole wheat flour is going to absorb more water than regular flour, so if you decide to use one over the other, keep in mind that you’ll need to adjust the flour/liquid ratio. Sorry for the complicated response. I just wanted to make sure you didn’t get terribly confused. I hope this helps!
Hello! I went and bought regular whole wheat flour before I read this and found out what the difference is. That being said, how would you adjust the water to accommodate the regular while wheat flour?
Hi there Lizzie! Regular whole wheat flour should work interchangeably in this recipe! Enjoy!
I LOVE homemade bread. I’ve had mixed results in the past. I also love to use whole wheat when possible. Unfortunately, my husband is not such a big fan of it. Oftentimes I will do half whole wheat and half unbleached flour. It does seem to improve the texture.
This bread looks so beautiful. And I just so happened to need to make a loaf or two day as we have none in the house at the moment.
i was not sure a bread that required no kneading would be any good, it looks kind of flat and crumby-not a chewy bread that is kneaded- i did not like this at all-
.
It has no stretch its very yeast tasting and very crumbly in texture- like a Biscuit not a bread .
I did not like this at as a bread – too dense and crumby.
Hi Sue! I am so sorry to hear that the recipe didn’t work for you!
The only thing I could think that would make the bread turn out like that would be adding no yeast, not enough yeast, using inactive yeast, or not letting the dough rise long enough. Again, so sorry it didn’t work for you! Best of luck!
Cheers!
I proofed the yeast so it was good, I let it rise 5 hours then shaped loafs and set for 40 min and baked . It really was not the yeast ad the rise was just as instructed . I just thought compared to other breads I make the lack of kneading the dough seemed to be missing and you don’t get a really good bread texture . I thought it wasn’t a good way to make bread . Just my preference in a good bread. I think the best ones I have baked from come from coyote cafe bread cook book . But thanks anyway!
Appreciate trying it !
I’m fairly new and intimated about baking bread…so I had to knead the dough in order to separate it- any tips you can offer would be appreciated.
also, I used a mixture of white flour and whole wheat – it’s what I had in the house. Nevertheless, this is by far the best bread I’ve made so far! thanks for the recipe!
This was great! I followed everything exactly, and the bread is delicious! Will definitely be making this again!
I’m so glad you liked it Stephanie! This is one of my favorite bread recipes!
This bread was so easy so nice to eat and so healthy it is a must.I topped it with a lovely seed mix which enhanced the loaves so much.
Thank you for this recipe. I made it for our holiday of sukkls to go with a hearty soup. It was very good. I did not have a broiler pan so i put a low and flat roasting rack on a cookie sheet, covered with tin foil and cut some holes in it. Then i put the water on the cookie sheet before baking and it worked out great! I also baked one loaf on a reg cookie sheet. It was also good but not same texture as the first one. Good either way thgh. Thanks again!
Hello! Can’t wait to try it! I was wondering if it’s possible to make small buns instead of bread loafs? Any suggestions or tips? Much appreciated!